How to Draw a Face
Become a face drawing pro with our step-by-step tutorial. From proportions to shading, we’ll teach you how to draw a face like a professional artist.
Join us, the artists, as we break down the art of face drawing into simple steps. Whether you’re a novice or experienced artist, our tutorial will enhance your skills. Begin your journey to creating lifelike portraits!
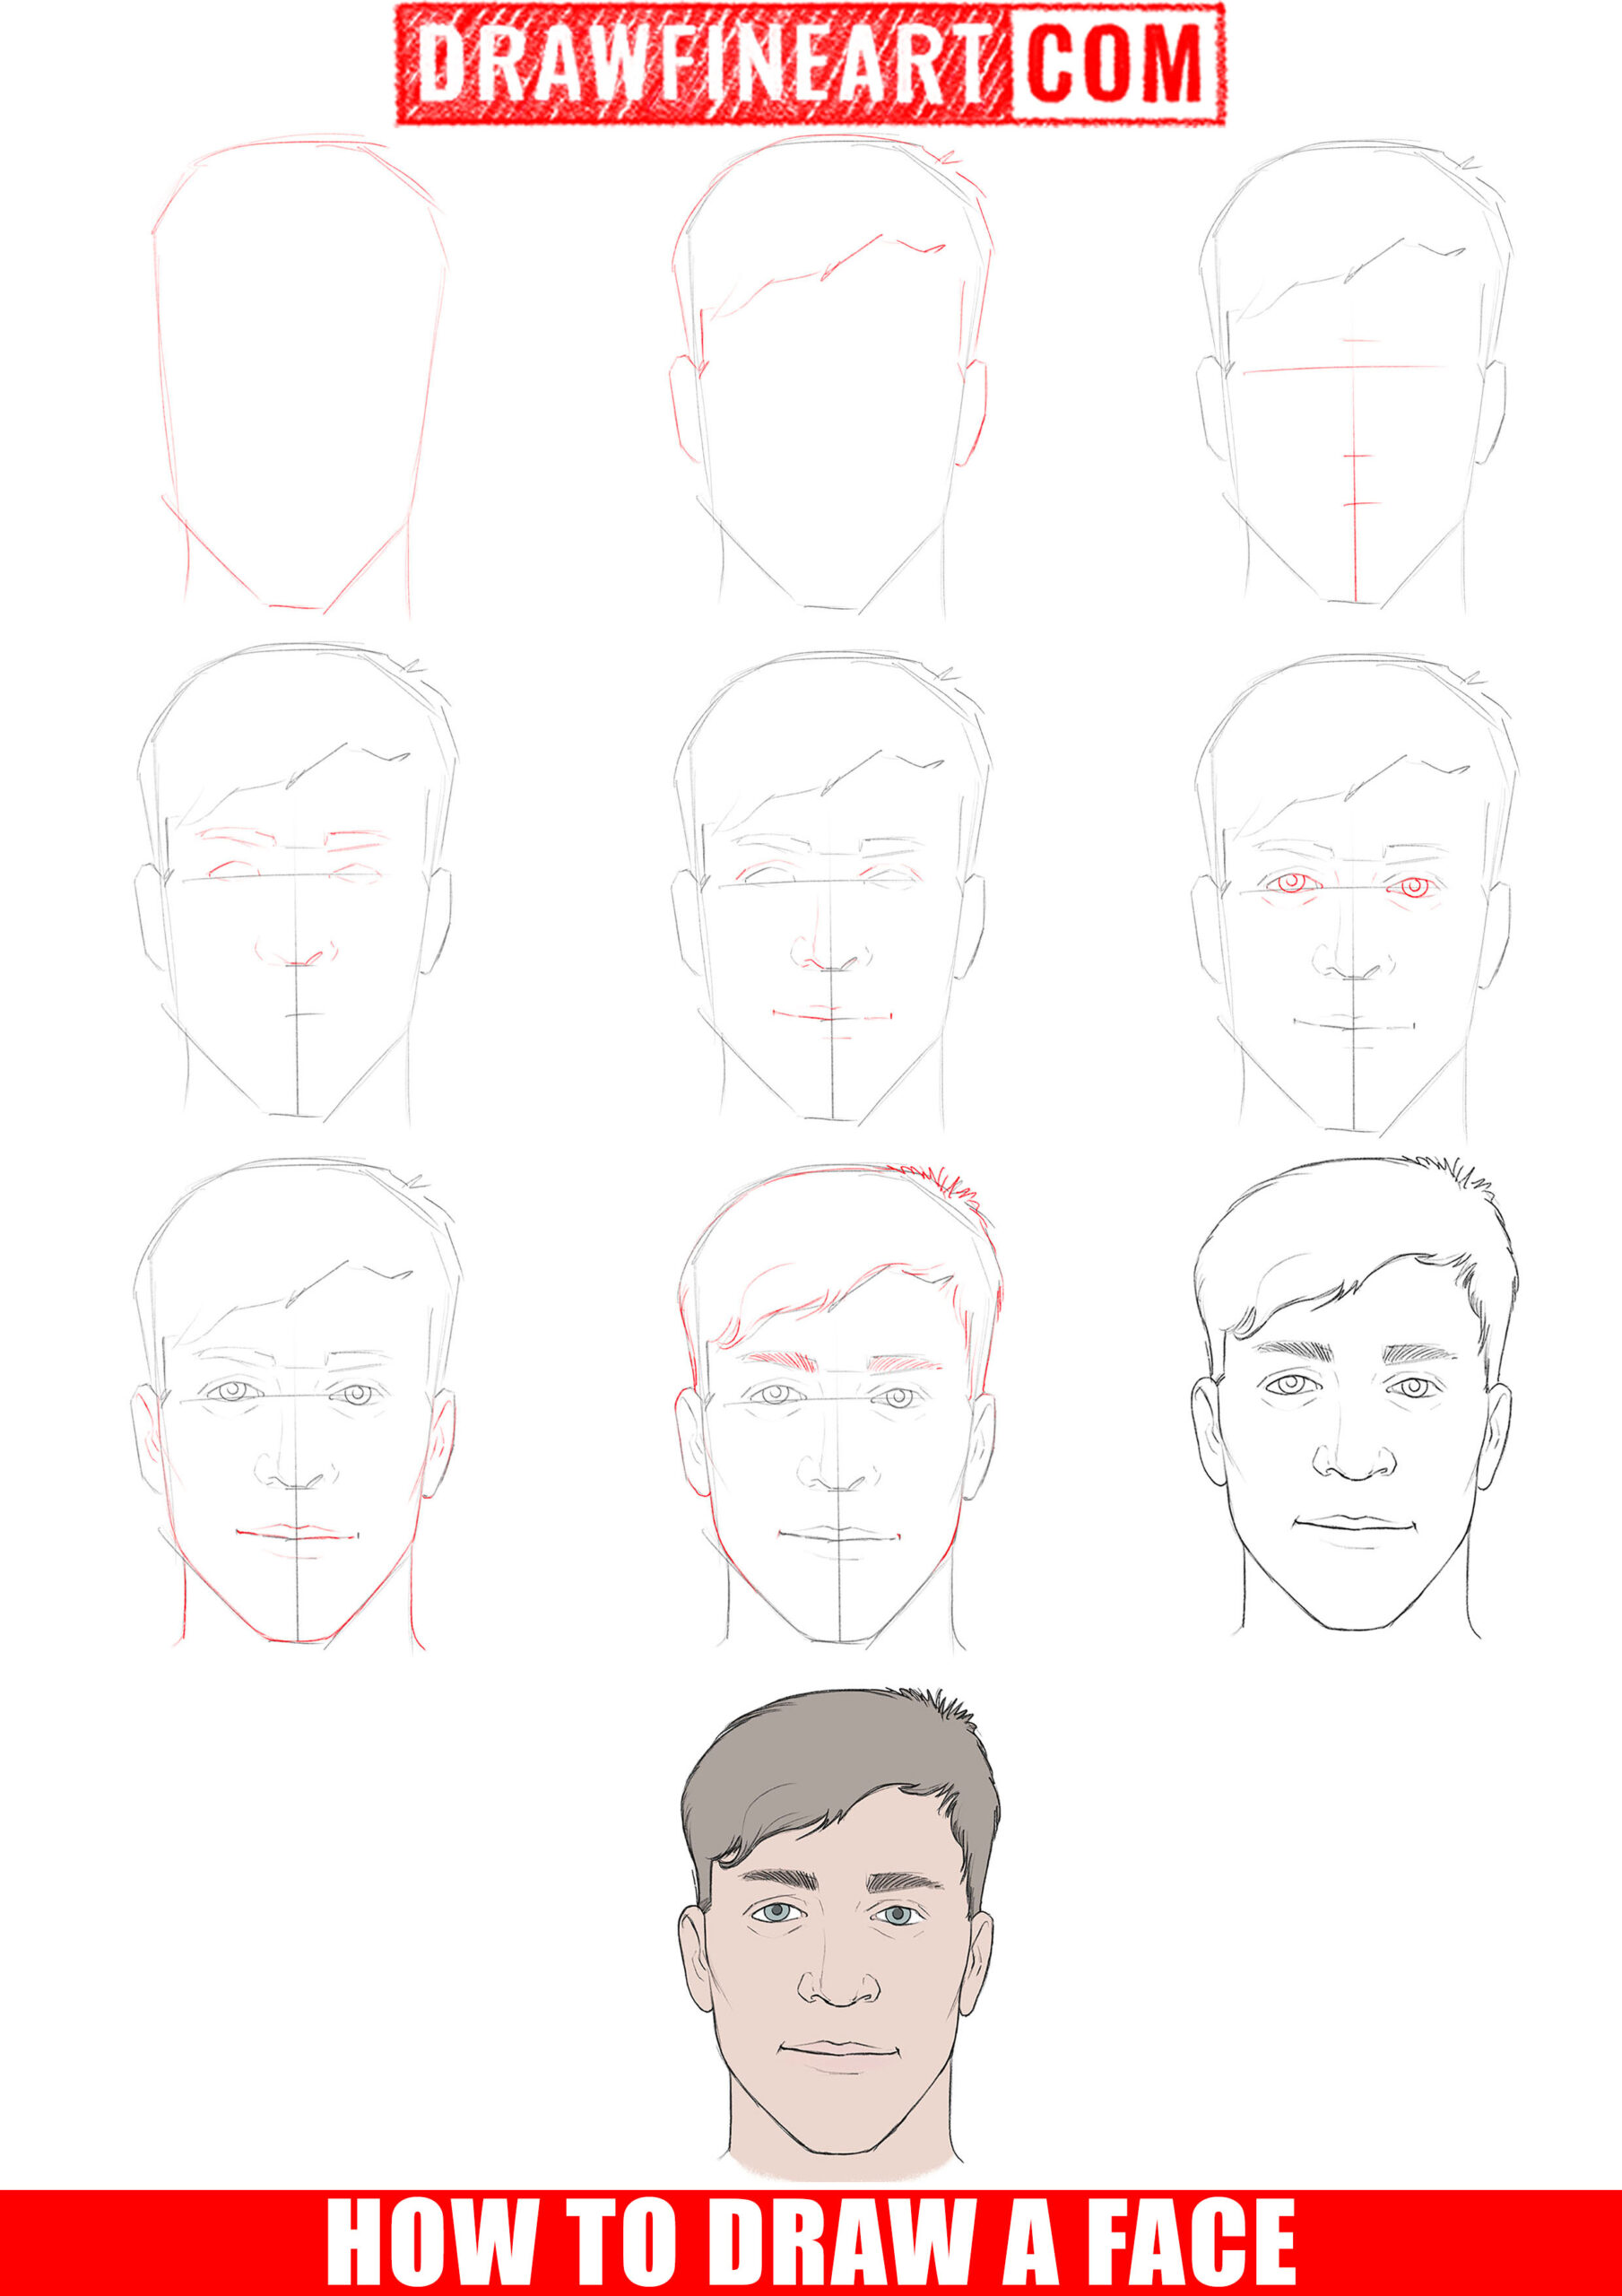
Table of Contents
How to Draw a Face: Introduction
Understanding proportions is fundamental when learning how to draw a face. The human face is divided into thirds vertically; from the hairline to the eyebrows, from the eyebrows to the bottom of the nose, and from there to the chin.
Horizontally, the face can be split into fifths, with the eyes occupying the middle fifth and the width of one eye typically measuring the space between them. The edges of the nostrils line up with the inner corners of the eyes, and the mouth width is usually aligned with the pupils when looking straight ahead.
Our face drawing tutorial emphasizes these proportions to help our readers capture the essence of the face they are drawing. Each feature must be placed carefully: the ears align with the eyebrows at the top and the nose at the bottom, the hairline varies but typically starts at the top third, and the neck width is roughly two-thirds of the face width.
By understanding and applying these proportions, the face gains a natural and realistic appearance. Mastering these measurements allows for deviations to portray a wide array of faces with different characteristics and expressions.
As our readers progress through the face drawing lesson, they will learn how slight alterations to these proportions can convey age, emotion, and individuality, transforming a simple sketch into a portrait with depth and personality.
How to Draw a Face Step by Step
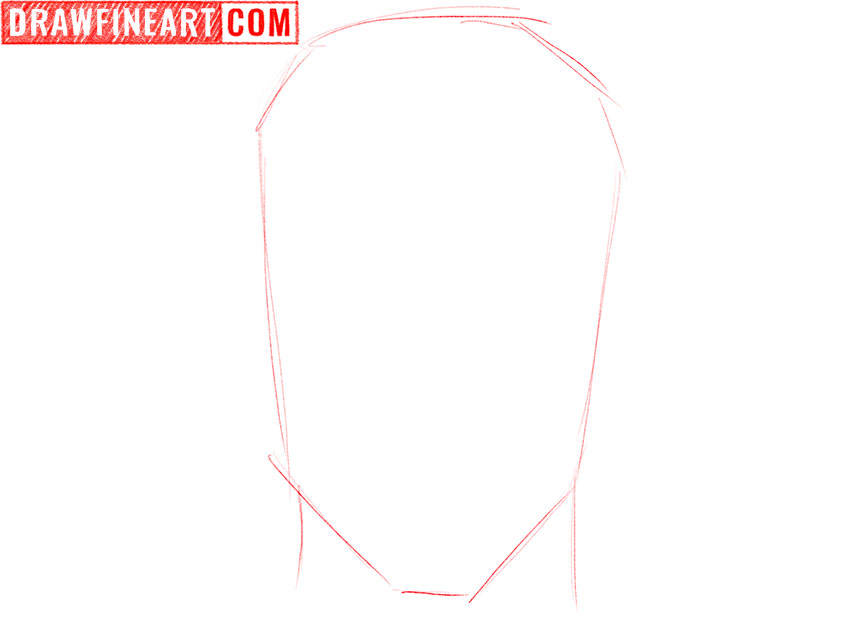
Step 1 — Begin by establishing the foundational lines.
Outline the external contours of the head. The head takes on an oval shape, with the upper part being wider and the lower part narrower. Towards the lower portion of your drawing, include the contour for the neck.
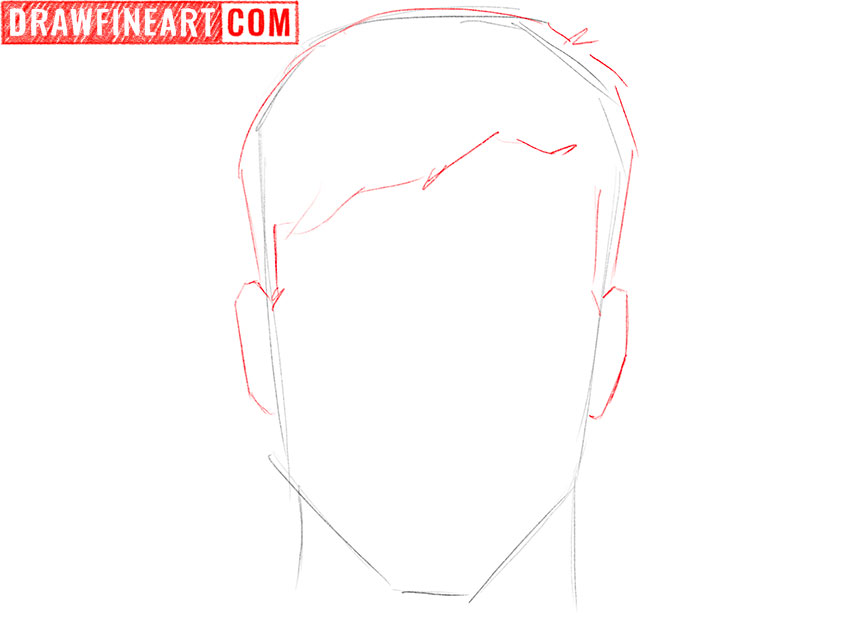
Step 2 — Outline the hair and ears.
Begin by drawing the ears on each side of the head. Next, add short, smooth lines around the head’s upper portion to depict the hair. These lines should vary in length to add a sense of texture and depth to the hair.
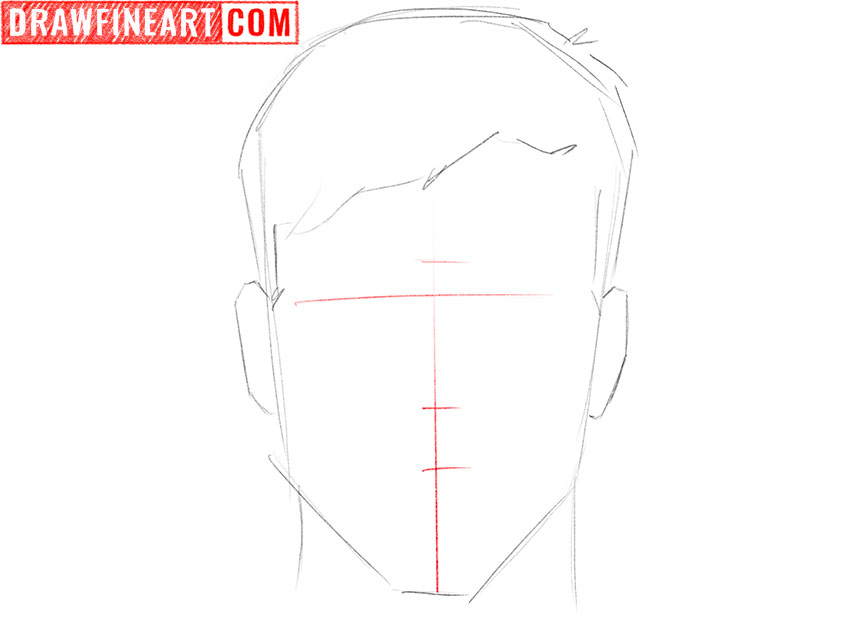
Step 3 — Create a layout for the facial features.
In the center of the face, draw a straight vertical line and add horizontal marks along it to guide the correct placement of the eyebrows, eyes, nose, and mouth.
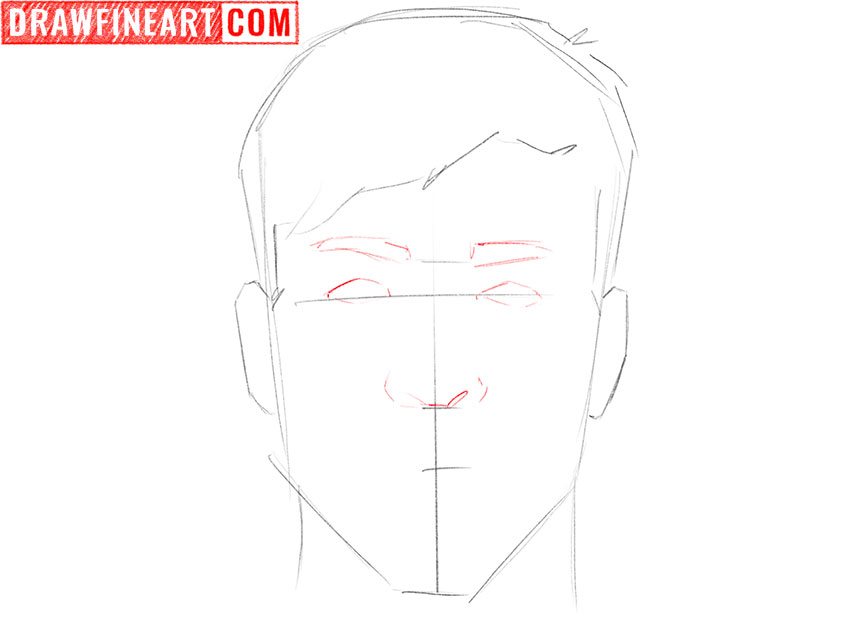
Step 4 — Outline the eyebrows, eyes, and nose.
Refer to the guiding lines and sketch the eyebrows with a shape similar to our example. Draw two eyes. Depict the nostrils and nasal openings. This stage adds definition to the facial features, bringing your drawing to life.
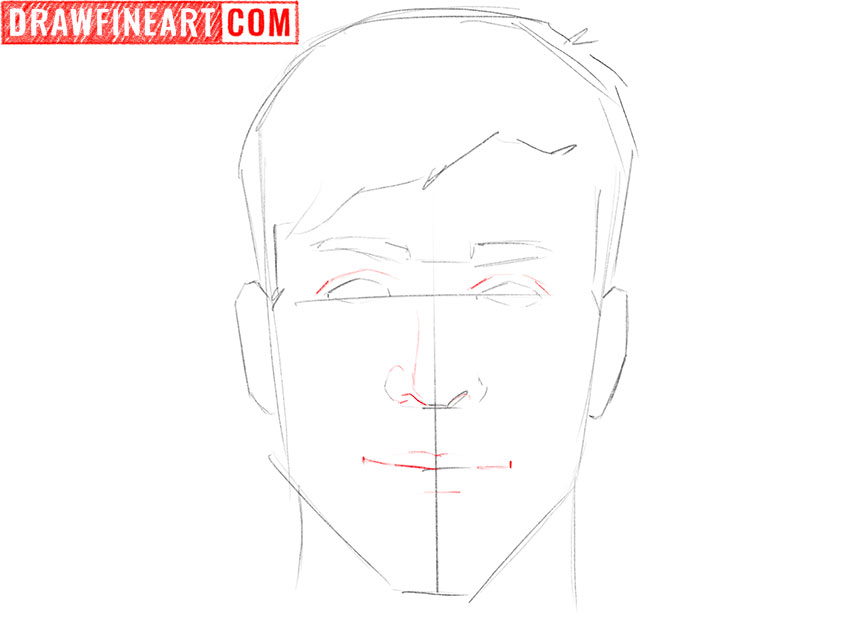
Step 5 — Draw the mouth, add eyelids, and refine the nose on the face.
Use the guiding lines to draw the mouth on the face. Use smooth lines to indicate the position of the upper and lower lips. Above the eyes, illustrate the eyelids, and draw the central part of the nose.
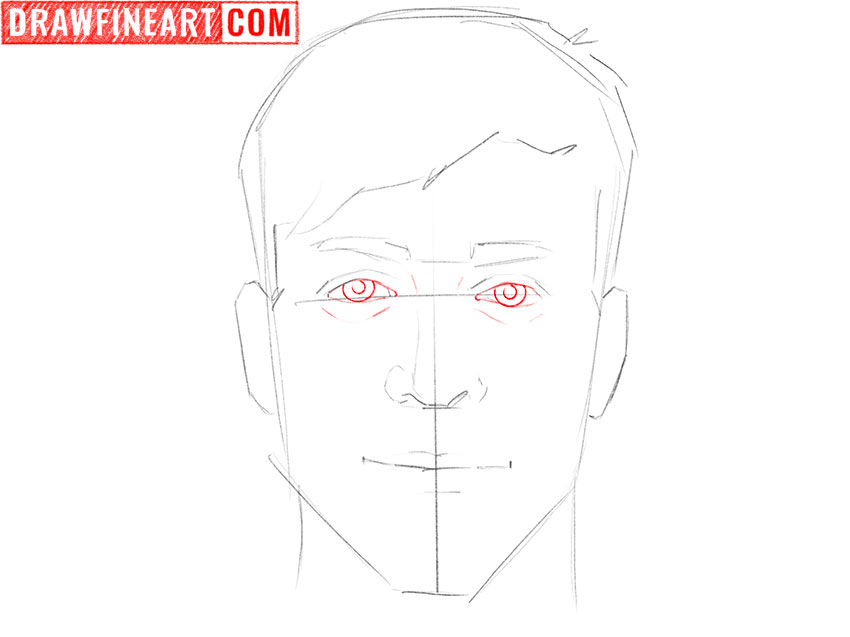
Step 6 — Draw the eyes detail on the face.
In each eye, draw the iris and pupil. Take note that the upper part of the iris is concealed by the upper eyelid. Draw the bridge of the nose and the skin folds on the lower eyelid on the face.
Step 7 — Refine the ears and draw the contours of the lower part of the face.
Use curved lines to create the inner details of each ear. Refer to the guiding lines and carefully trace the outline of the lower part of the face and neck. Enhance the definition of the lips.

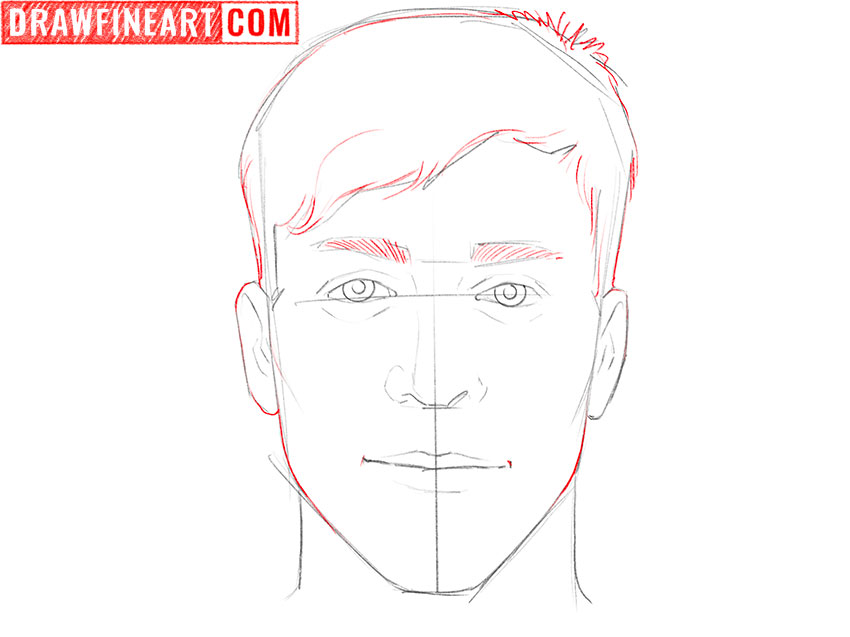
Step 8 — Draw the details to the upper part of the face.
Give the eyebrows a more realistic appearance by illustrating individual hairs with short strokes. Define the other facial contours more distinctly and elaborate on the hairline.
Step 9 — Correct any inaccuracies.
At this stage, with every facial feature accurately drawn, it’s time to remove the guiding lines. Carefully remove away these preliminary marks. Do this gently to avoid disturbing the detailed work you’ve done on the face itself.

Step 10 — Color the face drawing.
Select skin tones that resemble real human skin, choose iris colors that mimic natural eye colors like blues, greens, or browns, and use hair colors such as brown, blonde, black, or red to achieve a lifelike appearance.
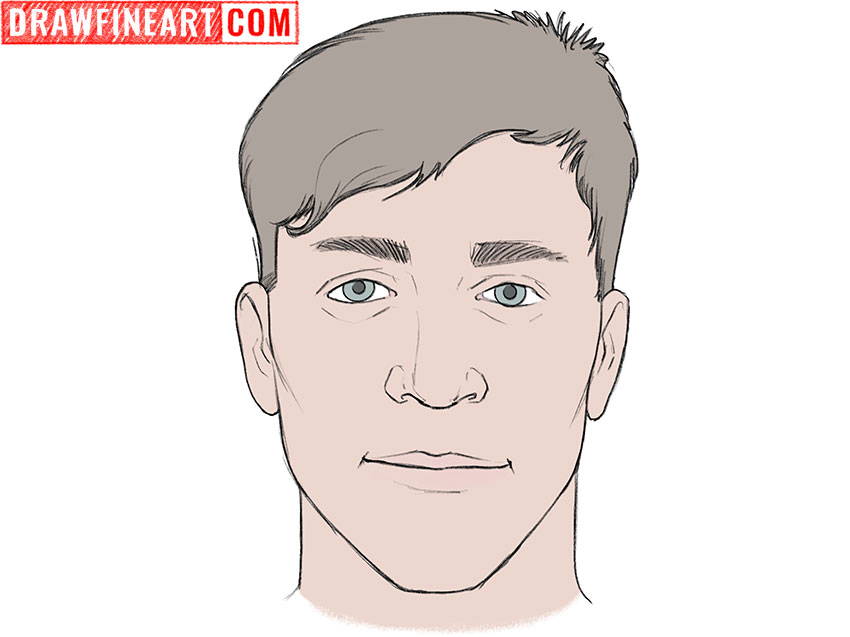
Completing the FACE Drawing Tutorial
Now that we’ve successfully laid the foundation and added intricate details to our face drawing, it’s time to bring it to life with the final touches. Follow these recommendations to enhance your drawing:
- Focus on skin texture: Pay attention to skin texture, adding fine lines, pores, and subtle imperfections to make the skin appear more natural and lifelike.
- Eyelashes and eyebrows: Render individual eyelashes and ensure the eyebrows match the hair’s texture and direction.
- Eyelids and creases: Highlight the upper eyelids and add creases to convey depth and expression in the eyes.
- Facial hair (if applicable): If your subject has facial hair, use short, precise strokes to draw the beard, mustache, or stubble on the face.
- Eyes’ sparkle: Add a small, bright highlight in the eyes to give them a spark of life and realism.
- Check proportions: Double-check the proportions of facial features to ensure they align correctly and maintain harmony.
- Background details: Consider adding a background or context to your face drawing, which can enhance the overall impact and storytelling.
- Personal style: Feel free to incorporate your unique style and artistic flair into your face drawing to make it distinctive and memorable.
Finally, remember, art is subjective, and there’s no one-size-fits-all approach. Experiment with confidence and enjoy the creative journey as you refine your face drawing skills. Happy drawing!


